If you own AirPods or AirPods Pro, sometimes you need to factory reset the wireless earbuds due to bugs, a delay, or even because you want to give them to someone else. Whether it’s due to connectivity, charging, or audio issues, it’s easy to factory reset your AirPods and here’s how.
Easiest factory reset for both AirPods or AirPods Pro

It doesn’t matter if you have a first-gen AirPods or the latest USB-C AirPods Pro 2, there might be several reasons why you want to factory reset the earbuds.
They might not be working as expected, there might be an issue that is troubling you, or you just want a fresh start. Fortunately, factory resetting these earbuds is really easy:
- Put your AirPods in their charging case, and close the lid.
- Wait 30 seconds.
- Open the lid of your charging case, and put your AirPods in your ears.
- Go to Settings > Bluetooth. Or go to Settings > [your AirPods].
- If your AirPods appear there as connected, tap the More Info button next to your AirPods, tap Forget This Device, then tap again to confirm.
- If your AirPods don’t appear there, continue to the next step.
- Put your AirPods in their charging case, and keep the lid open.
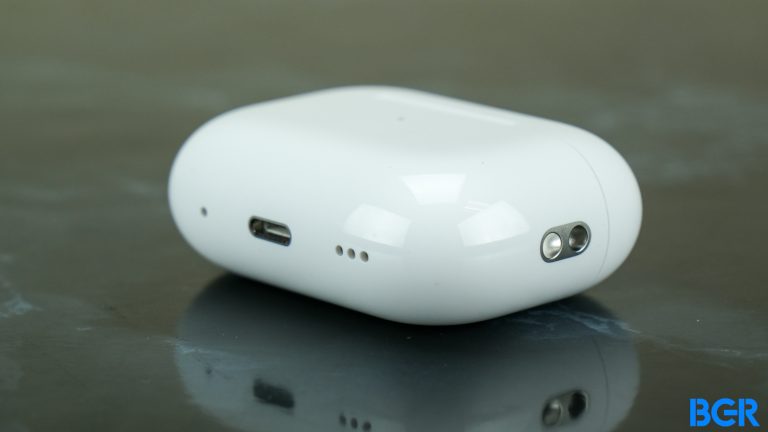
- Press and hold the setup button on the back of the case for about 15 seconds until the status light on the front of the case flashes amber, then white.
- Reconnect your AirPods: With your AirPods in their charging case and the lid open, place your AirPods close to your iPhone or iPad. Follow the steps on your device’s screen.
It’s important to notice that AirPods can only be associated with one Apple ID. If you want to use AirPods 3 or AirPods Pro that someone else has used, they first need to remove the AirPods from their Apple ID.
Now, if you want to connect your AirPods to your iPhone, iPad, Mac, or Windows device, we also got you covered.
Update to the latest firmware might also help
Sometimes, updating AirPods to its latest firmware might help resolve the bugs you might be experiencing. These are the latest versions available:
- AirPods Pro (2nd generation) with MagSafe Charging Case (USB-C): 6B34
- AirPods Pro (2nd generation) with MagSafe Charging Case (Lightning): 6B34
- AirPods Pro (1st generation): 6A300
- AirPods (2nd and 3rd generation): 6A300
- AirPods Max: 6A300
- AirPods (1st generation): 6.8.8
To check the firmware version of your AirPods, go to Settings, Bluetooth, and tap the “i” button on the earbuds you want to check.
That said, there isn’t an official method on how to update your AirPods firmware. Since Apple says new versions install when AirPods are connected via Bluetooth to your iPhone, the best option is to let both devices charge together for at least 30 minutes.
How to remove AirPods or AirPods Pro from Apple ID

Besides factory resetting AirPods or AirPods Pro, sometimes you need to remove them from an Apple ID – whether because you’re selling them or just want to give them to someone else. Here’s how to do that:
- Open the Find My app, then tap the Items tab or Devices tab.
- Tap the item or device you want to remove, then swipe up on the handle.
- Tap Remove Item or Remove This Device, then tap Remove to confirm.
How to remove AirPods from Find My on Mac
If you don’t own an iPhone but use AirPods every day with your Mac, you might need to remove them from Find My if you’re planning to sell or give them away. Here’s how to do that:
- Open the Find My app.
- Select the Devices tab.
- Select the device you want to remove.
- On the map, click the More Info button.
- Click Remove This Device.
Wrap up
This tutorial works with older versions of Apple’s operating systems and the current ones, such as iOS 17, iPadOS 17, watchOS 10, macOS Sonoma, and tvOS 17.
P.S. Did you know Apple recently updated AirPods Pro 2 with several new features after releasing iOS 17?.

