
Cheesemaking can be really labor intensive, with a lot of time spent stirring, standing, and waiting around for milk to fulfill its curdy destiny. But then the workload drops off, and you have to transfer your efforts to a cheese cave and wait while it hangs out in Tupperware or a vacuum-sealed plastic bag.
Then it’s time for the cheese to emerge from the cave and begin its journey towards your mouth, and an important step in that journey is wrapping it up. Wrappers play a vital role in cheesemaking, whether you’re dipping a cheese in wax to seal it, or wrapping it in folded wax paper for a final ripening the fridge. There are cheeses that require wrapping in alcohol-soaked bands of cloth to become the cheese they’re meant to be, and sometimes natural elements—like leaves or flower blossoms—are used to wrap cheeses in a way that imparts flavor, while giving them a rustic, charming look. Here are three ways to wrap your homemade cheeses like the gifts they are.
Dip it good
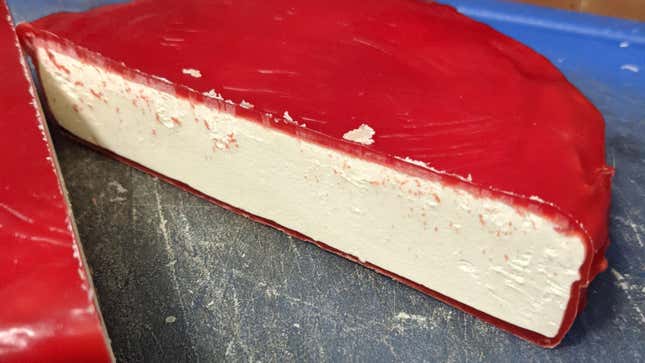
Some cheeses need to be sealed off from oxygen so they can mature, and wax is great at blocking airflow. Certain goudas, cheddars, and Swiss cheeses all benefit from a good waxing. For this, you will need cheese wax, which you can order online. Melt enough wax so you’re able to dip the cheese in halfway, then do exactly that.
With meticulously clean hands, dip the cheese halfway into the pot of wax for a count of two, then lift it out and allow it to drip for 10 seconds. Once the wax is no longer shiny, and has formed a skin, you can turn the cheese 180 degrees and, holding the waxed portion, dip the exposed half of the cheese into the wax. Let it drip for another 10 seconds, and set until it’s no longer shiny.
Now turn the cheese 90 degrees, and repeat the dipping process as described above; then another 180 degrees, followed by a final dipping. You’ll have dipped it four times total, once from each direction. The cheese should now be completely covered. Once it’s cooled to the touch, it can go back into the cheese cave to mature according to your recipe.
Wrap it like a present
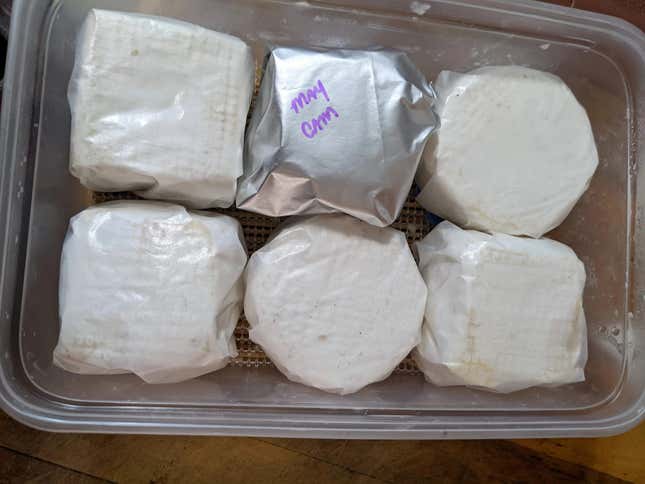
You can buy special wax paper and bags for wrapping and storing cheese; the paper allows cheese to breathe, which is essential for maturing a camembert, for example. A square cheese is simple; you’ve wrapped presents before—it’s the same thing. But most cheese is round, which presents a challenge. So learning how to crease and fold the paper as you turn the cheese is a learned skill.
Once you master it, the result is beautiful: Cheese is a gift, after all, and it deserves to be wrapped like one. Finished with a sticker or tape label so each package looks super profesh. Before they go to their final resting spot (your mouth or a friend’s mouth), you can wrap them in a second layer of foil. It’s not strictly necessary, but it does help insulate the cheese in the fridge from other flavors, mold, and yeasts, and it looks finished.
Get some nature involved
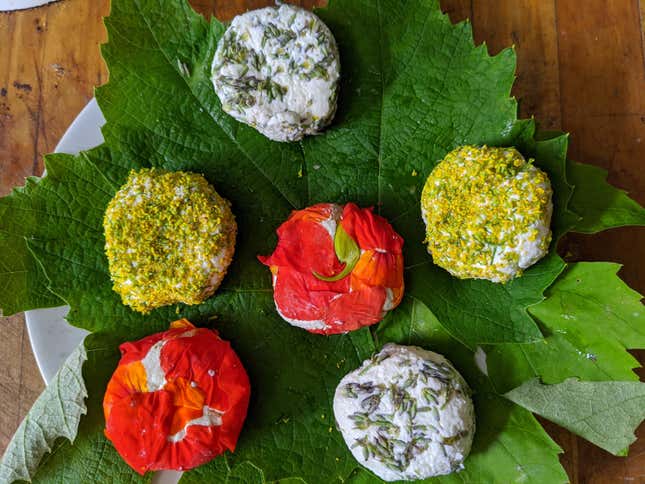
Your garden is full of things you can wrap cheese in, and you’re limited only by your imagination. There are a lot of options for softer cheeses in particular. Wrap bloomy cheeses in young grape leaves or oak leaves, and tie them up with twine. The tannins in the leaf impart some flavor to the cheese while providing a protective layer that makes it easier to transport.
Consider all the edible flowers in your yard. When I do, I think about nasturtiums, because of their color. Those blooms work perfectly with goat cheese or other soft cheeses. Pick fresh flowers, wash them and check for bugs, then allow them to dry before gently pressing them into the surface of the cheese.
If you’ve ever grown fennel, you know about fennel pollen. The stalks send up flowers, with a bright yellow, anise-like dust that’s adored by bees. You can tap the pollen into a jar or bowl; it’s highly coveted. Dust your cheese with the pollen for a vibrant, saffron-colored coating, with the benefit of some additional flavoring.
You’re really only limited by imagination (and knowing what’s edible or toxic in your yard) but if you can eat it, you can use it to coat, wrap, or otherwise encase your beautiful cheese treasures.