You’ve probably got a ton of photos and videos in your social media and messaging apps at this point—pictures of sunsets posted to Instagram, pictures of the kids posted to family WhatsApp groups, and so on—but you might not necessarily have those pictures and videos saved anywhere else.
That can be a problem, should something happen to the originals—say you’re thinking about abandoning a social media platform, for instance. It’s never a good idea to only have your most important files in one place, so we’d recommend making sure your social media and messaging photos and videos are exported and backed up. This counts for photos and videos other people send you too, as well as those you post yourself.
We can’t cover every single social media and messaging app here, but we’ve outlined the steps for five of the most popular and well-known below. If there are other apps that you use, a hunt through the settings options may well reveal the export or backup feature that you’re looking for.
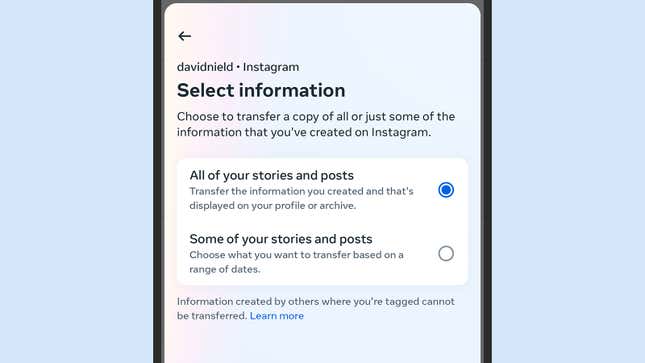
Full credit to the engineers at Instagram for making this process as simple as possible. If you load up the app and tap your profile picture (bottom right), tap the three horizontal lines (top right), then choose Your activity and Transfer your information, you have the option to send your stories, photos, and videos directly to several services, including Google Photos and Dropbox.
Alternatively, choose Download your information instead of Transfer your information to save your photos and videos somewhere, and then back them up yourself. You’ll be given a download link that contains all of your posts across the timescale you’ve chosen—just be sure to choose HTML as the format type and high as the quality.
If you want to make sure future content you post is also saved to your phone’s camera roll (which can then be backed up to Google Photos, Apple Photos or another service), after tapping the three horizontal lines choose Settings and privacy then Archiving and downloading (Android), or Settings, then Preferences, then Original photos (iOS).
Twitter / X
Twitter doesn’t export all of your posted photos and videos directly to other services, so you’re going to have to download them and then take care of the uploading to another photo and video service yourself. From the mobile app, tap your profile picture (top left), then Settings and Support, Settings and privacy, Your account, and Download an archive of your data.
You’ll be notified when the archive is ready, and a download link will be sent to your registered address. This download archive will include everything you’ve ever posted, including a folder containing images and videos attached to your tweets—these can then be backed up or transferred to another service as needed.
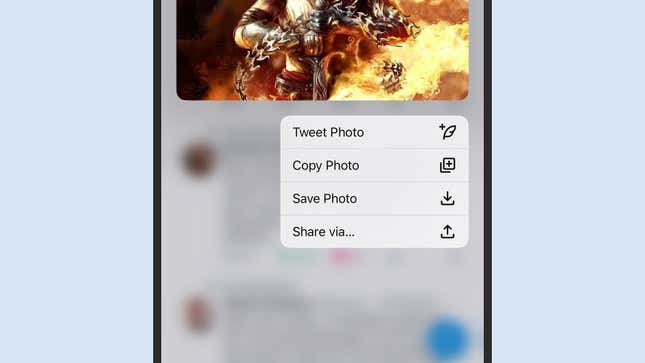
If you want to be more selective about images and videos you export, you can head to your profile on Twitter, then tap and hold on an image or a video—you can then tap the three dots and Save (Android) or Save Photo or Save Video (iOS) to save it to your phone, and from there it can be backed up somewhere else.
Snapchat
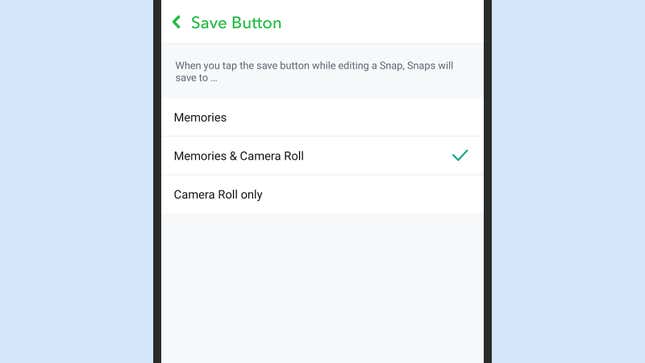
Snapchat lets you save everything you post to your camera roll on Android and iOS, and from there you can back it up to the service of your choice (usually Google Photos or Apple Photos). In the app, tap your profile picture (top left), then tap the cog icon (top right), then Memories: On this screen make sure the save button is storing pictures and videos in both Snapchat’s own Memories archive and your own camera roll.
To export existing Snapchat Memories that you haven’t previously saved, tap the Memories button (bottom left on the camera screen), then tap and hold on an image or clip, and select any additional ones as required. Tap Export, and you’ll be able to send the selected content to another app of your choice.
You can also create a downloadable archive of everything you’ve done on Snapchat: Log into Snapchat on the web, then click My data to start the process. Make sure the Include your Memories and other saved media toggle switch is on as you work your way through the process of generating your Snapchat archive download.
WhatsApp has a built-in backup function that covers photos and videos as well as chats, and makes use of Google Drive or iCloud, but you can’t actually get into it and see your files. If you want to be able to get this content out and into another photo service, you need to go via your phone’s primary photo service or use manual methods.
On Android, tap the three dots (top right), then Settings and Chats, and make sure Media visibility is enabled. In Google Photos on Android, you also need to make sure WhatsApp folders are included: Tap your profile picture (top right), Backup, the cog icon (top right), and then Back up device folders. Over on iOS, in WhatsApp tap Settings and Chats, and enable Save to Camera Roll.
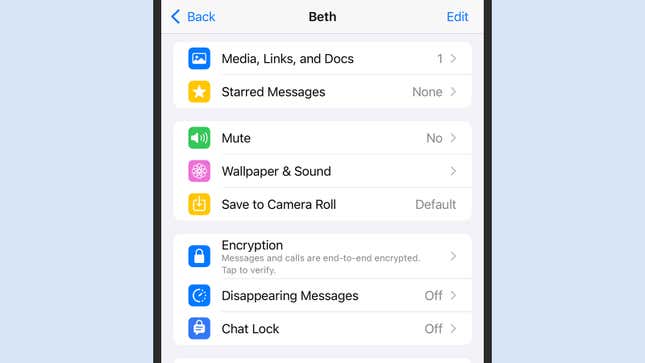
You can also save and share photos and videos manually. In a specific conversation, tap the contact or group name at the top, then Media, links, and docs, and you’ll see all of the photos and videos in a conversation. You’re then able to save these to your phone’s camera roll or share them to another app.
Facebook Messenger

If you want to get photos and videos out of Facebook Messenger and into your digital photo platform of choice, it’s a similar approach as the one you take with WhatsApp. Tap and hold on any image or video in a conversation to find the option to save it to your phone’s camera roll (on iOS, you need to tap More to find the option).
To have all of your photos and videos from all of your chats saved automatically to your camera roll—and from there to Google Photos or Apple Photos—you need to head into the Facebook Messenger app settings. On iOS, open up Facebook Messenger, tap the three horizontal lines (top left), then the cog icon and Photos & media and enable Save photos and videos.
On Android, from the main conversation list, tap the three horizontal lines (top left), then the cog icon, then Photos & media and enable Save on capture. You also need to make sure Google Photos is backing up the Facebook Messenger folders: From Google Photos, tap your profile picture (top right), then Backup and the cog icon (top right), then Back up device folders.

